Wednesday, March 6, 2019

111RS SPYDER BUILD: PART 4

A Spyder is an open car with a cut-down windshield. This seems like a vulnerable configuration for some and for others absolutely thrilling. Naturally, we are in the latter camp but I am not willing to throw all safety considerations to the wind (pun intended). The Exige comes with a factory roll hoop that is a nice safety solution though when you see it raw, it is not too attractive. I wanted to update this car with a roll hoop that was also stylish.

We have a local supplier of fabricated parts that is an excellent cage builder. We brought our Spyder over and gave them our requirements. The car came back with a solution that I am very happy with. The only real requirement I gave them was to ensure that the stock Elise clam would fit over it - minus the roll hoop cover - which we intend to leave off.

The stock intercooler will get ditched for a special ProAlloy kit…

The stock intercooler will get ditched for a special ProAlloy kit…

The height is slightly higher than stock for a wee bit better protection. We had a harness bar incorporated into the hoop so we can add a set of race harnesses. The tubes cross over and follow down at an angle to the base where it bolts into the stock mounting location. One challenge of installing a steel cage into an aluminum chassis is attaching it. In this case, we simply used the factory threaded inserts. We are also triangulating it to the rear subframe mount - though those two tubes will be hidden under the modified Elise clam.

ABS module is off for a PM rebuild.  Did you notice that?

ABS module is off for a PM rebuild. Did you notice that?


I’m really happy with how it looks. The twin hoops add some flavor and admittedly, extra weight. But we are stripping enough away from other areas that this is an acceptable place to bulk up…

Monday, February 18, 2019

111RS SPYDER BUILD: PART 3

We started work on the body to create something unique yet would meet my demands for performance. This car is getting an Elise rear clam with rear fender flares and a modified rear wing. I had been calling it a Ducktail but truthfully, it will be more of a Longtail.

The rear flares will allow us to run our ETHOS 17x9 rims with either 235, 245, or 255 tires. The car is expected to make 300hp so a bit more meat on the rear will be welcome. Additionally, we won’t be running a larger rear wing. This car will have our Exige race front clam plus canards. The additional downforce at the front should be balanced with the wider tires and long-tail wing.

ReVerie rear flares add some real width and bulk - we decided a bit too much.

ReVerie rear flares add some real width and bulk - we decided a bit too much.

Ultimately we have decided to cut down the flares a bit to remove the bulk. We’ve borrowed a look from our friends in the JDM world but it will have our twist on it.

Long Tail not Duck Tail

Long Tail not Duck Tail

Initially, my plan was to create a Ducktail spoiler but as we began laying up the wing, we decided a Longtail would look cleaner and fit with our style. Many of you know that I am quite particular about how things look on these cars and have innovated many aesthetic changes that were controversial when I first showed them. The image above shows how we have extended the existing wing angle. We cannibalized a wing from a junked rear clam to help up create this custom wing and clam. A few other detail changes include shaving off the rear fake vents that were outboard of the taillights.

I am excited that these changes will be unique and not overly cartoonish. We want to grab attention without looking like some of those Bosozoku cars from Japan….

sideview new livery.jpg

Thursday, February 7, 2019

Suspension Rebuild Frequency

unnamed.jpg

Recently we have had a few cars coming in for service with blown shocks. Most had aftermarket shocks but one had factory shocks as well. The rebuild frequency depends on how you use your car but without fail, all suspensions do need a rebuild at some point. We have sold 100s of Nitrons over the years yet we have rebuilt only a couple dozen as most people don’t realize that their shocks are in need of a rebuild. The degradation happens slowly and we adjust our driving style to accommodate.

Many of us have upgraded our factory suspensions with adjustable systems from Nitron, Ohlins, Racetech, Penske, etc. These shocks all need rebuilds at intervals that are based on your driving style/mileage. Factory shocks typically need to be rebuilt after 50k miles but we are seeing them aging out as well on the Elise. Aftermarket shocks typically should be rebuilt every 3-4 years for most of us. If you are racing for checkered flags, we would recommend a yearly rebuild. This will ensure your shocks are in proper condition to maximize your car's potential.

Why do these shocks need to be rebuilt sooner than OE shocks? Seals, oils, and gas charges all will degrade with use or even time. Cars that are driven hard on track will also heat up the internals and oil to the point of needing a rebuild. If you are one of the fast guys and love to bang your car off the curbing you should consider even more frequent rebuilds.

What are indications that your shocks are blown? One obvious issue is leaking shocks. When the oil starts to leak, it will make a mess. You will have dirt collecting all over the suspension area. Another indication is ride height that has sagged. Sometimes all shocks will start to sag, other times one shock will degrade faster. Having your alignment checked yearly is one way to check this.

Rebuild cost is not something many of us consider when we buy aftermarket shocks. But this additional cost is the price we pay for more adjustability and hopefully superior handling.


Friday, February 1, 2019

111RS Spyder Build: Part 2

We have been working on our project car - even with the big move into our new shop. Progress is slow but sure. We decided to disassemble the suspension, brakes, and power train to assess the condition of all the parts and chassis. We knew that much of these parts would be either upgraded or rebuilt.

Delivered with a smile from TX

Delivered with a smile from TX

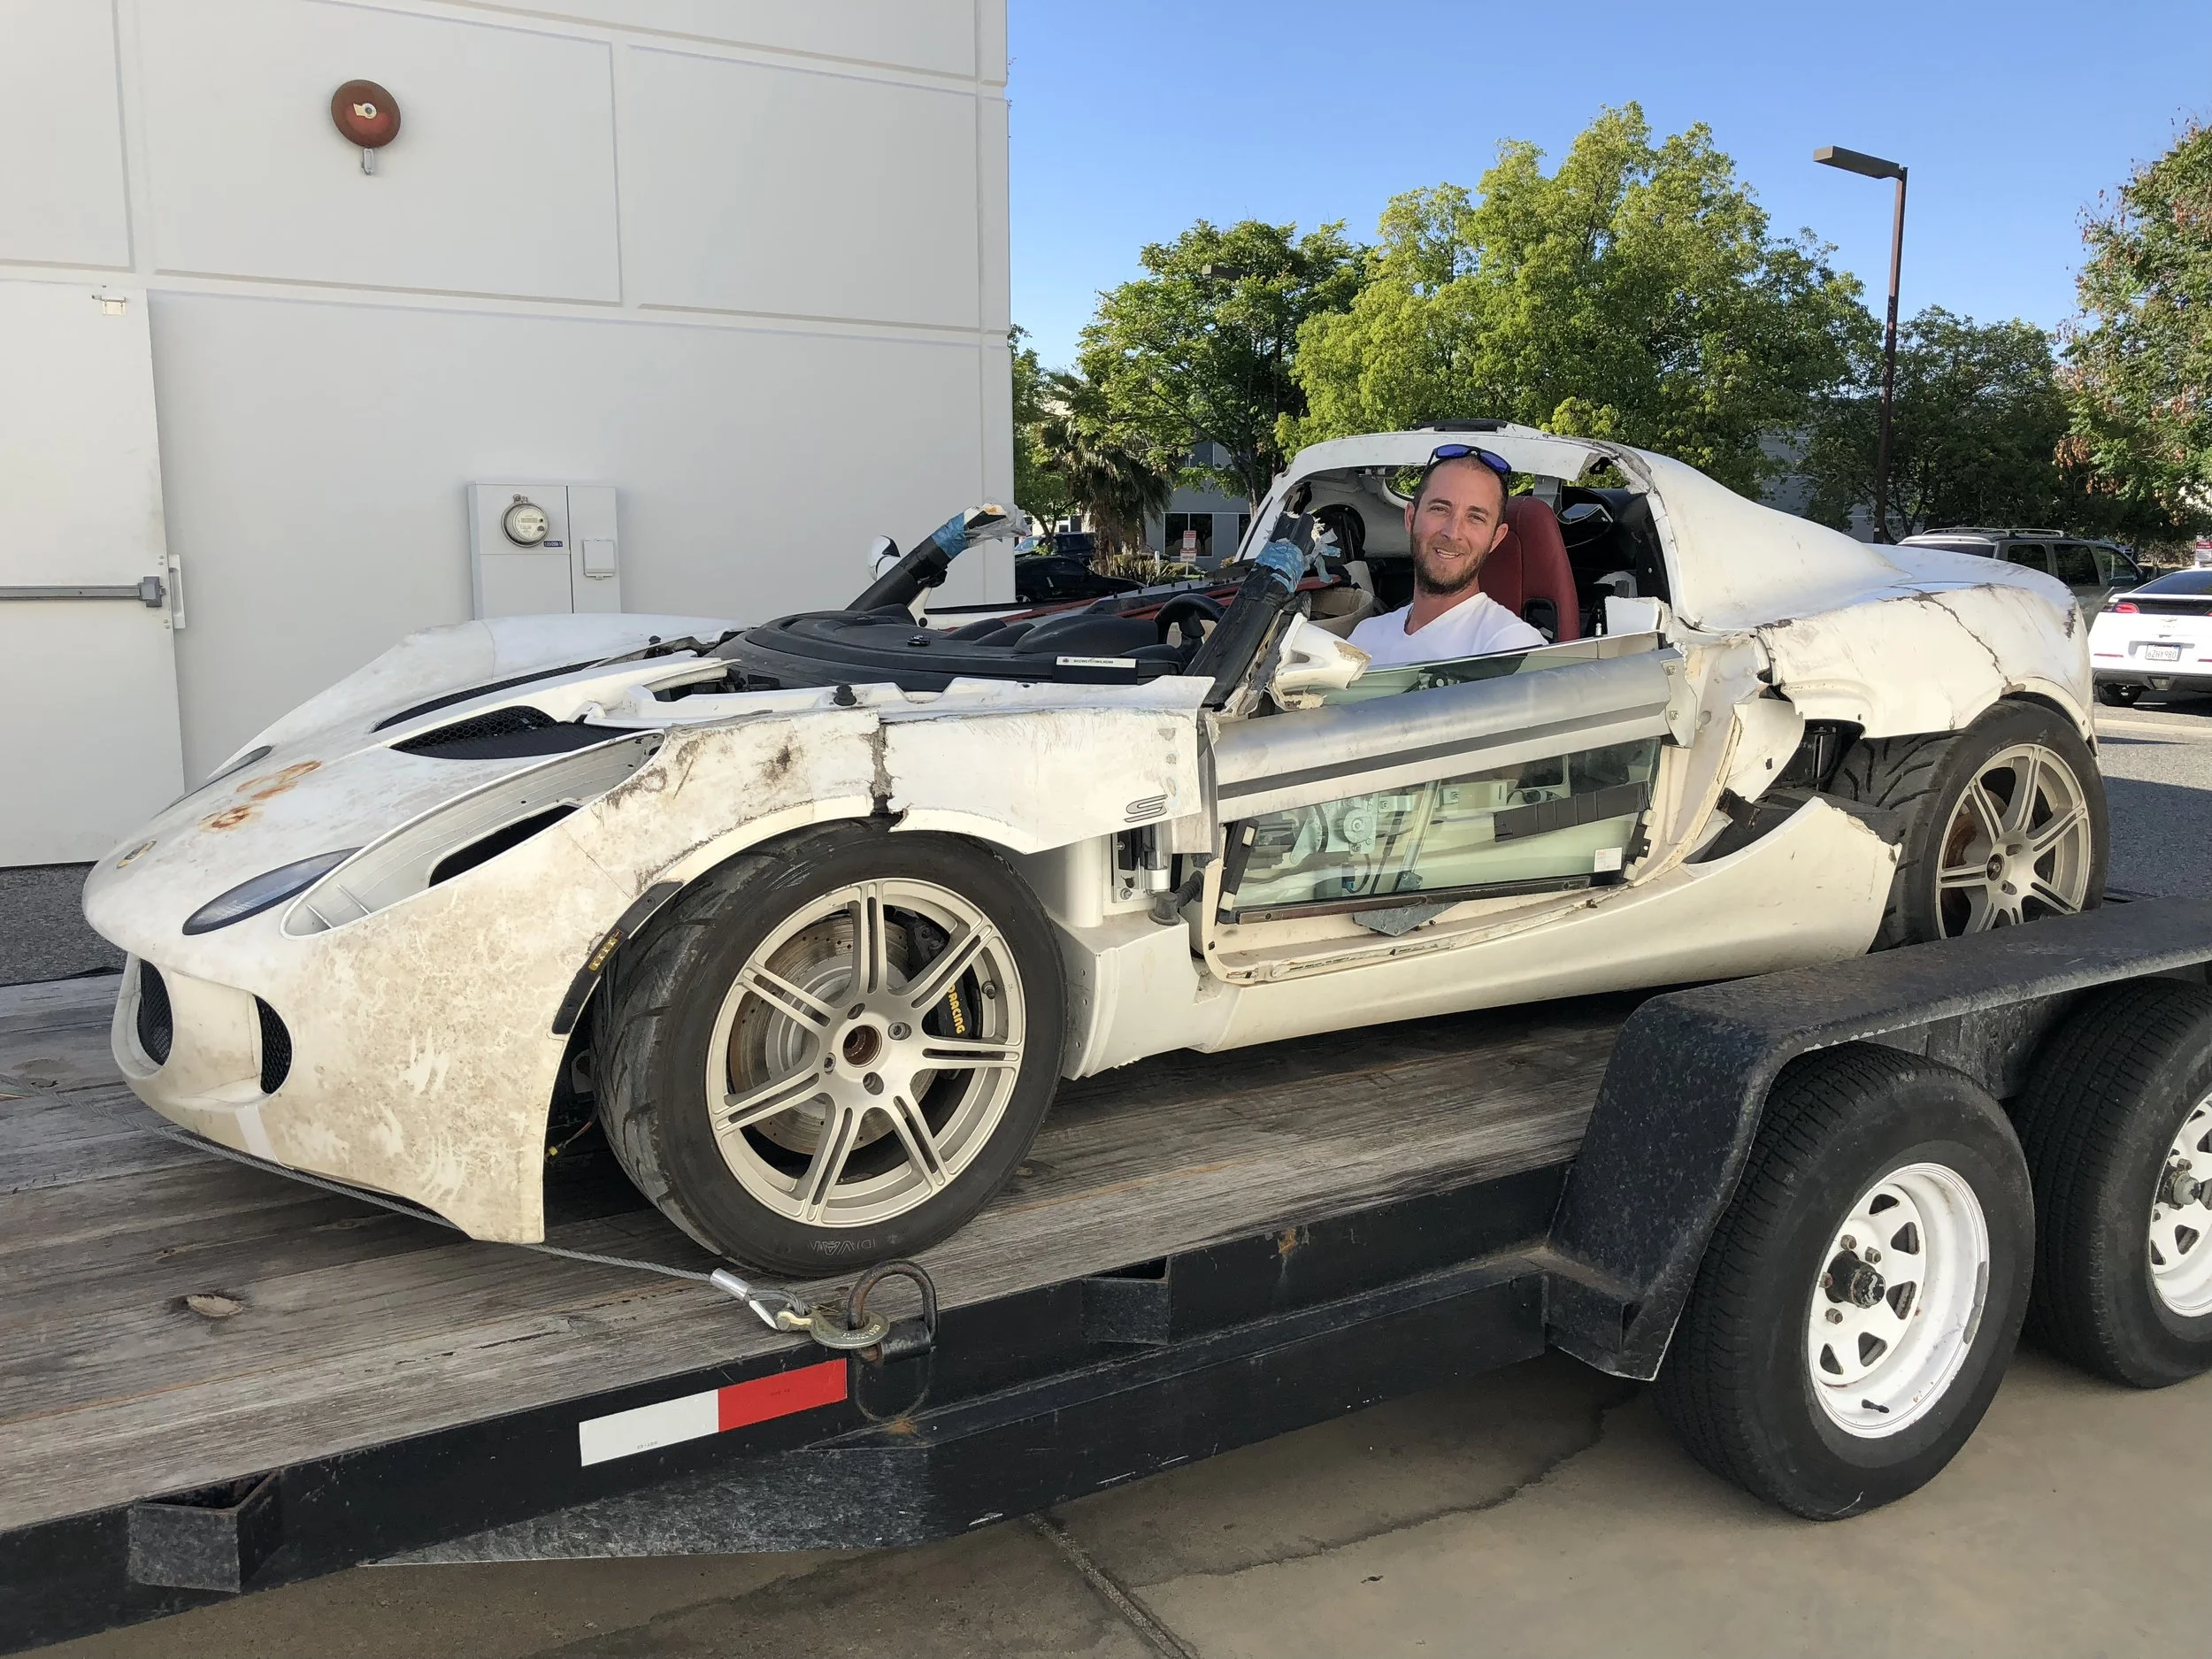
Some of the wishbones had been replaced by the previous owner as this car was driven off the trailer. Of course, we had to take it around the block - just because we are nuts like that.

Photo+Nov+14%2C+11+24+26+AM.jpg

We confirmed that the chassis was undamaged after the engine/trans were removed. The roll hoop was toast and a couple of engine mounts were tweaked but amazingly the chassis and subframes were all in good shape and undamaged. Whew! Taking on projects like this can be fraught with real risk and we certainly did not dodge every bullet.

Yanking the powertrain

Yanking the powertrain

We installed one of our Rebuilt Gearboxes with CF Synchros and stronger 3rd/4th gears. We also installed our TRACKmounts as the client wanted more isolation and was willing to deal with a bit more NVH (Noise, Vibration, Harshness). This car will never be confused for a pedestrian Lotus so we threw comfort out the window. As a matter of fact, we will also throw out the windows….

Time to refresh these tired looking wishbones…

Time to refresh these tired-looking wishbones…

We decided to strip the wishbones and have them plated. We pushed out the bushes and ball joints. Our local plater does an amazing job and they came back shinier than new with a nickel finish. We installed our MONOballs along with fresh hardware and ball joints from our Suspension Refresh kit.

Shiny, shiny, shiny…

Shiny, shiny, shiny…

We decided to install the Racetech 46mm Triples on this car as we wanted to showcase our locally produced shocks. We will also be installing the DNA Rear Swaybar so that we can run soft springs. My Elise is running this kit so we will have a nice baseline as we tune the handling to ensure this is the ultimate canyon carver.

The chassis got a good cleaning after we pulled all the suspension bits off…

The chassis got a good cleaning after we pulled all the suspension bits off…

Tuesday, November 20, 2018

111RS Spyder Build: Part 1

We are building a new Lotus Elise Spyder and I wanted to start blogging about the work. This car is based on an Exige S240 and will feature many of our mechanical upgrades. We have a brave client, Shane, who has agreed to be our sponsor and I can’t think of a better client to work with. Shane has owned many cool cars including an Elise, Atom3, GTR, and more.

Our inspiration

Our inspiration

We love light cars and the Lotus are from the factory, very light. Drastic measures are needed to really shave weight from these cars. Our donor Exige S240 had rolled on track so was in need of new bodywork so we got thinking…this sketch below came from one brainstorm with a designer Sergio.

cropped sketch.jpg

We decided to run with this rally inspired style and landed on the following renders from our friends at RogueCollective.

111RS Spyder Homepage3.jpg
111RS Spyder Homepage2.jpg

Friday, October 12, 2018

Repair Your Lotus Marker Light

unnamed.jpg

The Lotus Elise/Exige marker lights suffer from broken posts that attach it to the clam. These plastic posts can snap when an overzealous hand tightens a bit too generously. Replacement parts are getting harder to find so repairing your broken part is often the best option.

Carlos has come up with this great idea that will allow you to fix your light. The basic steps are as follows:

  1. Cut off the broken post - flush with the base
  2. Drill a hole where the post was located
  3. Use a coarse threaded screw with an appropriately sized washer to attach the light to the clam

Please see the picture below for better clarity on this tweak.

marker light.jpg

Monday, September 3, 2018

Brake Pad Types and Bedding Pads/Rotors

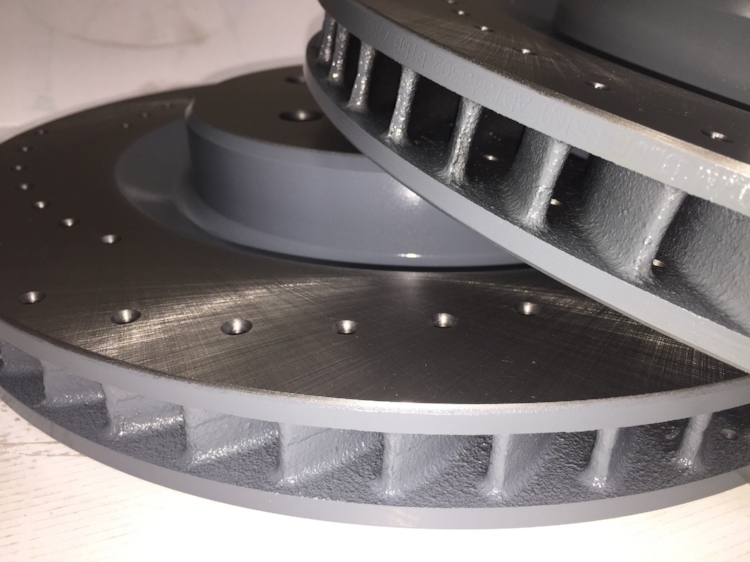
Evora Rear Rotor Vents.jpg

Brake pad selection is often a tricky affair.  A pad that works well for one person may not be good for another.  It is good to understand the different types of brake pads along with bedding in procedures.  This blog attempts to shed light on these areas to better allow the reader to make the best choice.

There are 2 types of brake pads; those with abrasive friction and those with adherent friction. 

  •  Abrasive friction simply means the brake pad provides friction by touching and rubbing on the rotor itself to create the necessary friction for stopping.  Break-in is much easier with this type.  
    • This type of pad is abrasive, and the rotors will wear much more rapidly - especially when they are cold.  
  • Adherent friction means that the brake pad is transferring a layer of pad material onto the rotor.   As a result, brake performance comes from pad material against pad material.  With this type of pad, rotor life is generally much higher.  Trail braking can be done very smoothly with this type.  
    • One negative with these types of pads is that bed-in is more difficult.  If you don't do it properly, an uneven transfer layer on the rotor will cause a vibration that appears to be 'warped' rotors.  Luckily you can clean the rotors of the uneven pad layer and start once again with proper bed-in.  We recommend purchasing pads of this type already 'Pre-bedded'.   

     Properly bedding your pads and rotors will greatly extend their life and give you maximum performance.  Follow the manufacturer's recommendations for best results.  I have also detailed our procedure below for adherent friction pads that we sell (G-loc):

    Proper bedding instructions for Street Compound (GS-1):

    1.      Brake from 60mph down to 30mph about 4-6 times.

    2.      Then let your brakes cool for about 2-3 minutes while driving.

    3.      Repeat step # 1.

    4.      Allow the brake pads and discs to cool down to ambient temperature (about 30 minutes or more).

    NOTE: Proper bedding of pads & rotors will result in greater performance and longer pad & rotor wear.

    Proper bedding instructions for Track or Race Pads (G-loc R8, R10, R12):

    1.      All new brake pads require a bedding process, start this process by pumping your brakes a few times to assure proper installation. Once on track perform several moderate (medium) near stops (to a very slow rolling speed) to thoroughly warm up the pads and rotors. This should take 1-2 laps. This allows a thin layer of the pad material to be transferred into the micro-grooves of the rotor.

    2.      After the pads/rotors are warm, perform a series of hard near stops (to a slow rolling speed) until some brake fade is felt. This process should take about 2-4 laps (depending on the track). Once this occurs, then stay off the brakes (as much as possible) and bring your car into the pits/paddock to completely cool. Do not lock the tires during this operation.

    3.      Allow brake pads and/or rotors to cool down to ambient temperatures; no less than 30 minutes. The total bedding procedure should not take more than 5-6 laps or about 10-15 minutes.

    NOTE: The proper way to bed your brake pads and brake discs (rotors) is to bed them on the racetrack, NOT on the street (excluding the GS-1 compound).  We know this is not always possible so please find an empty stretch of road.

    Warning: Failure to properly bed in your pads could lead to friction material to chunk and break up resulting in poor pad performance and pad life. Improper bedding can also lead to overheating your pads and causing them to glaze over resulting in the car not being able to stop or slow properly.

    Bedding procedure for brake rotors

    New discs (rotors) just like pads need to be bedded in. Proper bedding will increase the rotor life and make it more resistant to thermal cracking. Before installing the new brake discs (rotors), be sure to thoroughly clean discs with clean wipes and brake cleaner. By cleaning the disc surface you want to make sure you have completely removed any and all grease, surface residue, and debris that might contaminate or damage the brake pads. Once the discs (rotors) are installed on the vehicle perform the following procedure. Please note that you can bed new pads & discs (rotors) at the same time.

    1.      Start out with several near stops for the first 1-2 laps, while gradually increasing your speed and brake force with every stop.

    2.      Next, do another 1-2 laps at normal speed followed by a cool-down lap. The gray coloration is the pad material depositing a transfer layer of material into the micro-grooves of the disc. This process is pinnacle in achieving the best performance and life out of the rotor.

    3.      Then allow rotor(s) to completely cool down to ambient temperature.

    Proper USED brake rotor bed-in procedures:

    1.      If rotors have been previously bedded with G-loc or Carbotech brake pads, then bedding the rotors again is not necessary.

    2.      If rotors were previously bedded using a different manufacturer’s brake pads; then it is strongly recommended that the used discs (rotors) be reconditioned/turned and meet minimum specification requirements.

    3.      Start out with several near stops for the first 1-2 laps, while gradually increasing your speed and brake force with every stop.

    4.      Next, do another 1-2 laps at normal speed followed by a cool-down lap. The gray coloration is the pad material depositing a transfer layer of material into the micro-grooves of the rotor. This process is pinnacle in achieving the best performance and life out of the rotor.

    5.      Then allow rotor(s) to completely cool down to ambient temperature.

    NOTE: Brake pads should be checked regularly. If pads are wearing evenly, then the pads can be used almost down to the backing plate.

    NOTE: Do not drag your brakes; meaning, do not continually drive around the track with applied pressure to your brake pedal. This does not bed brake pads and/or rotors properly. This can severely hurt the performance and life of your brake pads & rotors.

    Monday, June 25, 2018

    Even Stock Shocks Should be Rebuilt

    We know many of you are happy with the stock shock valving that came on your Lotus.  But all dampers need to be refreshed at some point.  Typically mileage is what most use to gauge when to replace them but age also plays a big role.  Since shocks degrade slowly and drivers unconsciously compensate, most don't realize that the suspension is not working as well as Lotus intended them to. 

    There is good news and bad news for those of you who want to stick with stock.  We now have stock of each of the varieties of dampers from Lotus.  We hired Bilstein to rebuild them to Lotus specs.  That is the good news.  You can also contact Bilstein like we did to get yours rebuilt but the lead time is 6-8 weeks.  If you don't want to have your Lotus down for that long, give us a call for a set.  We have them available for order on our website: HERE    

    Saturday, May 26, 2018

    Don't Drill Through Your SubFrame!

    We are not big proponents of permanently modifying street-legal cars.    Race cars are different animals so anything goes with them.  We serviced a car recently that had a competitive rear toe link installed.  What we found was troubling.  See the picture below. 

    As you can see, the hole that was drilled during installation is not centered.  Their kit requires drilling through the subframe and wishbone bushes to accommodate a larger bolt.  There is no good way to ensure that you will drill through the center of the bush - unless you remove it.  Clearly, this was installed by a shop that decided to drill the bush/wishbone while it was still in the subframe.  

    Additionally with this solution, you will never be able to return your subframe to stock as it will be permanently modified - which means diminished resale value.  We don't see any point in doing this as the marginally lower cost of their kit is clearly offset by the additional labor and future resale loss.

    missdrilled bush.jpg

    We are clearly biased as we sell bolt-in rear toe link braces that do not require such mods.  Have a look at our solutions before you permanently modify your car.  Find them: HERE

    We know that cars that don't have permanent mods tend to sell for higher premiums.  The closer the car is to stock, when you sell it, the more it will fetch.  We advocate installing only bolt-on solutions and retaining the stock parts just in case you plan to sell your car in the future.