Thursday, April 11, 2019

111RS SPYDER BUILD: PART 7

We keep crankin’ on the Spyder as the West Coast Lotus Meet approaches. We landed on a color for the roll hoop, tried to add a naca duct, and fit the Lexan windshield. Some success and one failure…

The roll hoop color was going to be either green or red. Our Powdercoaters showed me some options including a clear. I wanted to make sure the beautiful welds were not hidden. They recommended a Candy Apple Red powder coat that was translucent. It required a bit better surface prep as all the surface scratches are also visible. The final result is amazing and we are quite pleased with it. 


Sometimes you want to try out an idea and it requires cutting things. I had an idea to add a naca duct to the front clam to get a bit more air into the radiator. We had a nice CF duct and a plastic one. We took some measurements and it looked like we would be close. We made the decision to cut the clam and see if it would fit. Well, it didn’t! Luckily we have a man who does amazing work with fiberglass and we repaired it….


A Spyder is technically a roofless version of an existing sports car with a cut-down windshield. The previous Spyder we built had no windshield but this one was getting a small one. We decided to start with the Lexan version we sell. It required some test fitting to get the function & aesthetics right. We took measurements to determine what height we wanted the windshield cut down to. Carlos is 6’ tall and we wanted the windshield to land just above his view straight out of the car. We laid a tape line at the height to confirm and then cut it.


We are using a combination of screws and adhesive to bond the windshield. We first marked the location and then bonded nutserts into the windshield surround and a-pillar. Though we believe this will be enough to hold it, we plan to use a silicone adhesive to add additional bonding that will still make for ‘easy’ removal.


Monday, April 8, 2019

111RS SPYDER BUILD: PART 6

Bodywork continues. Jesus has blended the rear wing and rear flares in nicely. We decided to spray everything in primer to assess the lines and work. The multi-colored bodywork was not doin’ it for us…8^)

We added a new prep man, Damian, who is helping Jesus crank through the bodywork.

Photo Apr 02, 5 32 39 PM.jpg
Photo Apr 04, 3 19 25 PM.jpg

There are plenty of other details that we have been working on. The door striker pin plate was off on the roll hoops so we had to cut them off and reweld. Now the door fits well. Though this car is going to be fairly raw, we wanted to finish it with reasonable trim where ever possible.

Fitting the rear interior panel.

Fitting the rear interior panel.

Tuesday, March 19, 2019

111RS SPYDER BUILD: PART 5

The body is getting fitted and we are getting closer to the finish line. We have made some tweaks to the factory bodywork to make this car really unique and special. Though it started life as an Exige S240, we are converting the rear to an Elise clam. This allows us to reduce weight and improve rearward vision.

We have fiberglass repair capability so the Spyder is a good platform for us to show the extent of our abilities.

Repairing a door

Repairing a door

The original door was annihilated so a replacement was required. We found a damaged door that we repaired and fit. We will likely shave off the mount for the side view mirrors as we have a couple of ideas that we may choose to try out. The glass will be removed from the doors so we will likely cap the top of the door as well.

New rocker panel is fitted

New rocker panel is fitted

The driver side suffered a fair amount of rock panel damage. We chose to order a new one from Lotus and removed the old one. The new one fits with some work. Once that was in place we started bolting on the other panels and the Spyder began taking shape.

Elise clam with Longtail and modified flares.

Elise clam with Longtail and modified flares.

We first grafted on a set of ReVerie rear flares. I was not really happy with how bulky they look at the back. I opted to have them cut short to reduce the overall size at the bottom - while exposing more of the back of the tire. I think this will look great and add some visual interest. The portion of the flare that attaches to the rocker still needs to be bonded in the above image.

The rear wing was extended in an effort to create the longtail. Though I originally considered making a ducktail, this new longtail became more appealing as I spent time considering both. We were able to steal the stock rear wing off a damaged rear clam and bonded it onto this clam. Many hours of careful sculpting were required to get it to look right. My restoration specialist, Jesus, is an artist with a good eye. We collaborate very well and I am very happy with the final result. A few clients who have seen it agree.

Race Exige front clam fitted with Exige front fenders

Race Exige front clam fitted with Exige front fenders

The front Exige Race clam was installed. This clam has been used by many Lotus Cup racers. It is lighter and cheaper than a stock clam. We included the Exige front fenders as well. We plan to shave the side markers and relocate them. Fitting front lights to the car is one of the fun challenges we are currently wrestling with.

The above shot also shows the rear flares. I am happy with how these have turned out. The flares reduce air from hitting the front of the tire yet allow air to flush out the back without much restriction. The ETHOS 17x9 wheel will be fitted to the rear, so we will add slightly wider rubber as well. This should be nicely proportioned with a proper Coke-bottled shape.

side2.jpg

Wednesday, March 6, 2019

111RS SPYDER BUILD: PART 4

A Spyder is an open car with a cut-down windshield. This seems like a vulnerable configuration for some and for others absolutely thrilling. Naturally, we are in the latter camp but I am not willing to throw all safety considerations to the wind (pun intended). The Exige comes with a factory roll hoop that is a nice safety solution though when you see it raw, it is not too attractive. I wanted to update this car with a roll hoop that was also stylish.

We have a local supplier of fabricated parts that is an excellent cage builder. We brought our Spyder over and gave them our requirements. The car came back with a solution that I am very happy with. The only real requirement I gave them was to ensure that the stock Elise clam would fit over it - minus the roll hoop cover - which we intend to leave off.

The stock intercooler will get ditched for a special ProAlloy kit…

The stock intercooler will get ditched for a special ProAlloy kit…

The height is slightly higher than stock for a wee bit better protection. We had a harness bar incorporated into the hoop so we can add a set of race harnesses. The tubes cross over and follow down at an angle to the base where it bolts into the stock mounting location. One challenge of installing a steel cage into an aluminum chassis is attaching it. In this case, we simply used the factory threaded inserts. We are also triangulating it to the rear subframe mount - though those two tubes will be hidden under the modified Elise clam.

ABS module is off for a PM rebuild.  Did you notice that?

ABS module is off for a PM rebuild. Did you notice that?


I’m really happy with how it looks. The twin hoops add some flavor and admittedly, extra weight. But we are stripping enough away from other areas that this is an acceptable place to bulk up…

Monday, February 18, 2019

111RS SPYDER BUILD: PART 3

We started work on the body to create something unique yet would meet my demands for performance. This car is getting an Elise rear clam with rear fender flares and a modified rear wing. I had been calling it a Ducktail but truthfully, it will be more of a Longtail.

The rear flares will allow us to run our ETHOS 17x9 rims with either 235, 245, or 255 tires. The car is expected to make 300hp so a bit more meat on the rear will be welcome. Additionally, we won’t be running a larger rear wing. This car will have our Exige race front clam plus canards. The additional downforce at the front should be balanced with the wider tires and long-tail wing.

ReVerie rear flares add some real width and bulk - we decided a bit too much.

ReVerie rear flares add some real width and bulk - we decided a bit too much.

Ultimately we have decided to cut down the flares a bit to remove the bulk. We’ve borrowed a look from our friends in the JDM world but it will have our twist on it.

Long Tail not Duck Tail

Long Tail not Duck Tail

Initially, my plan was to create a Ducktail spoiler but as we began laying up the wing, we decided a Longtail would look cleaner and fit with our style. Many of you know that I am quite particular about how things look on these cars and have innovated many aesthetic changes that were controversial when I first showed them. The image above shows how we have extended the existing wing angle. We cannibalized a wing from a junked rear clam to help up create this custom wing and clam. A few other detail changes include shaving off the rear fake vents that were outboard of the taillights.

I am excited that these changes will be unique and not overly cartoonish. We want to grab attention without looking like some of those Bosozoku cars from Japan….

sideview new livery.jpg

Thursday, February 7, 2019

Suspension Rebuild Frequency

unnamed.jpg

Recently we have had a few cars coming in for service with blown shocks. Most had aftermarket shocks but one had factory shocks as well. The rebuild frequency depends on how you use your car but without fail, all suspensions do need a rebuild at some point. We have sold 100s of Nitrons over the years yet we have rebuilt only a couple dozen as most people don’t realize that their shocks are in need of a rebuild. The degradation happens slowly and we adjust our driving style to accommodate.

Many of us have upgraded our factory suspensions with adjustable systems from Nitron, Ohlins, Racetech, Penske, etc. These shocks all need rebuilds at intervals that are based on your driving style/mileage. Factory shocks typically need to be rebuilt after 50k miles but we are seeing them aging out as well on the Elise. Aftermarket shocks typically should be rebuilt every 3-4 years for most of us. If you are racing for checkered flags, we would recommend a yearly rebuild. This will ensure your shocks are in proper condition to maximize your car's potential.

Why do these shocks need to be rebuilt sooner than OE shocks? Seals, oils, and gas charges all will degrade with use or even time. Cars that are driven hard on track will also heat up the internals and oil to the point of needing a rebuild. If you are one of the fast guys and love to bang your car off the curbing you should consider even more frequent rebuilds.

What are indications that your shocks are blown? One obvious issue is leaking shocks. When the oil starts to leak, it will make a mess. You will have dirt collecting all over the suspension area. Another indication is ride height that has sagged. Sometimes all shocks will start to sag, other times one shock will degrade faster. Having your alignment checked yearly is one way to check this.

Rebuild cost is not something many of us consider when we buy aftermarket shocks. But this additional cost is the price we pay for more adjustability and hopefully superior handling.


Friday, February 1, 2019

111RS Spyder Build: Part 2

We have been working on our project car - even with the big move into our new shop. Progress is slow but sure. We decided to disassemble the suspension, brakes, and power train to assess the condition of all the parts and chassis. We knew that much of these parts would be either upgraded or rebuilt.

Delivered with a smile from TX

Delivered with a smile from TX

Some of the wishbones had been replaced by the previous owner as this car was driven off the trailer. Of course, we had to take it around the block - just because we are nuts like that.

Photo+Nov+14%2C+11+24+26+AM.jpg

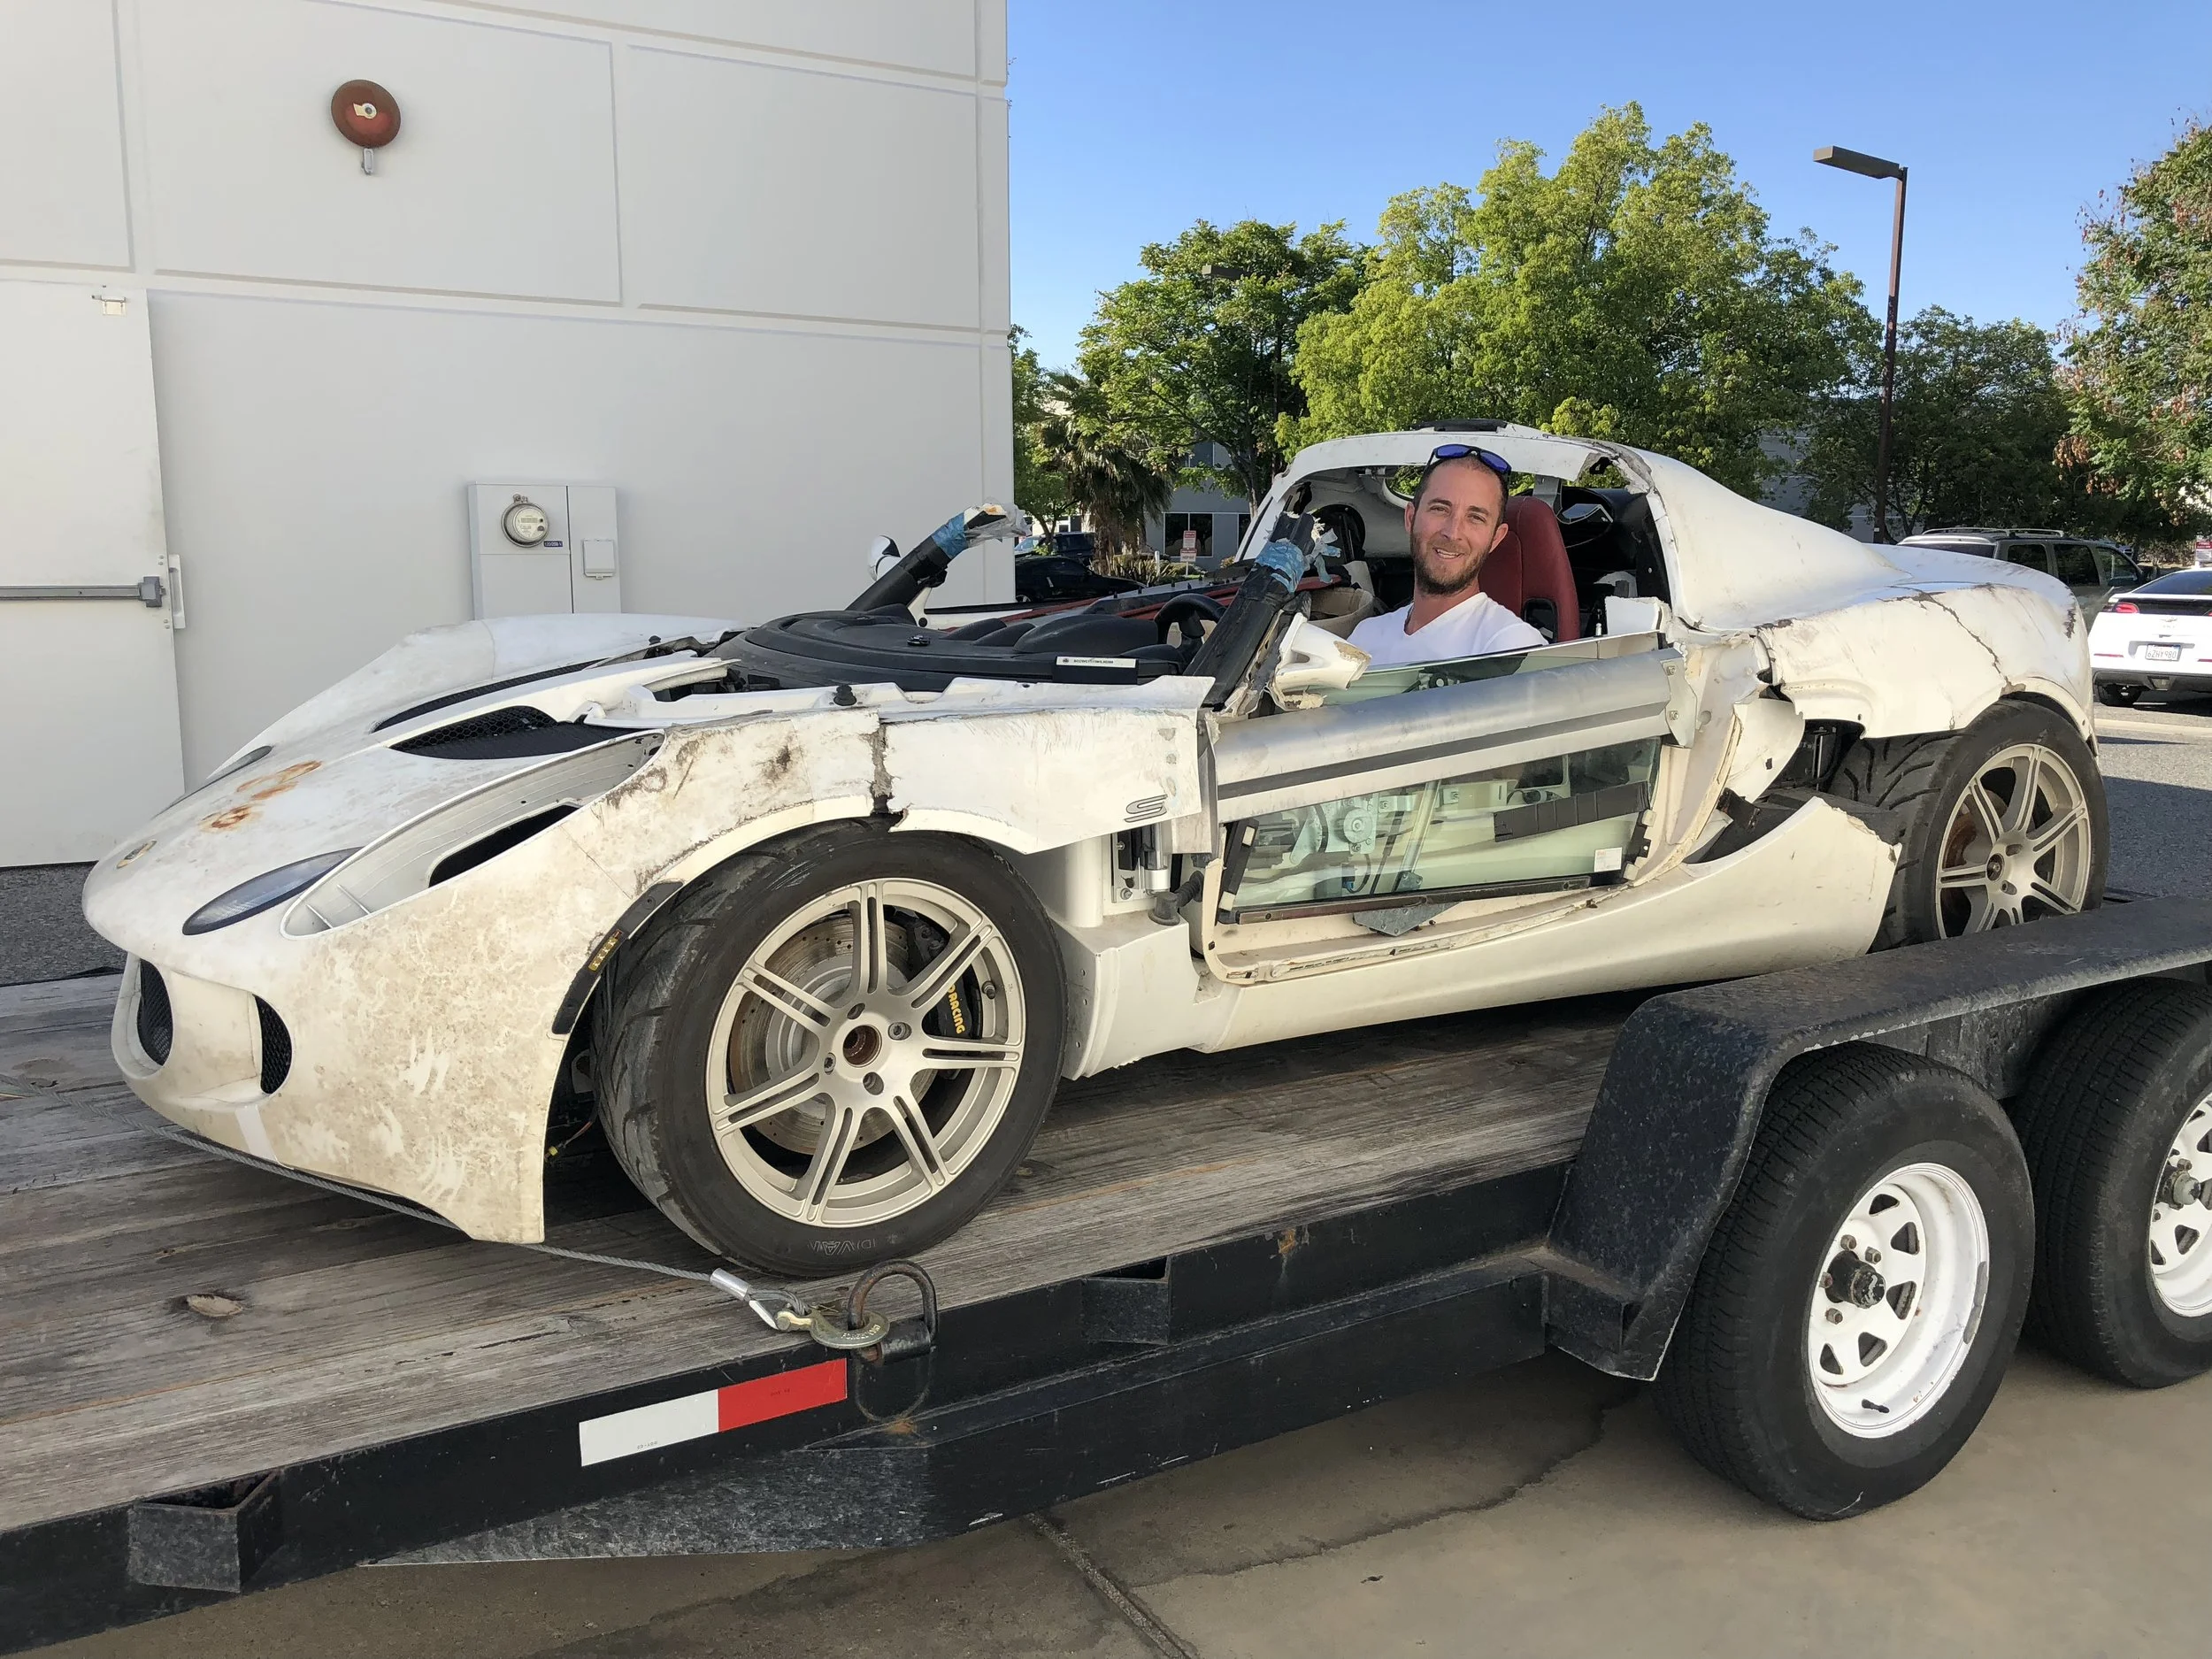
We confirmed that the chassis was undamaged after the engine/trans were removed. The roll hoop was toast and a couple of engine mounts were tweaked but amazingly the chassis and subframes were all in good shape and undamaged. Whew! Taking on projects like this can be fraught with real risk and we certainly did not dodge every bullet.

Yanking the powertrain

Yanking the powertrain

We installed one of our Rebuilt Gearboxes with CF Synchros and stronger 3rd/4th gears. We also installed our TRACKmounts as the client wanted more isolation and was willing to deal with a bit more NVH (Noise, Vibration, Harshness). This car will never be confused for a pedestrian Lotus so we threw comfort out the window. As a matter of fact, we will also throw out the windows….

Time to refresh these tired looking wishbones…

Time to refresh these tired-looking wishbones…

We decided to strip the wishbones and have them plated. We pushed out the bushes and ball joints. Our local plater does an amazing job and they came back shinier than new with a nickel finish. We installed our MONOballs along with fresh hardware and ball joints from our Suspension Refresh kit.

Shiny, shiny, shiny…

Shiny, shiny, shiny…

We decided to install the Racetech 46mm Triples on this car as we wanted to showcase our locally produced shocks. We will also be installing the DNA Rear Swaybar so that we can run soft springs. My Elise is running this kit so we will have a nice baseline as we tune the handling to ensure this is the ultimate canyon carver.

The chassis got a good cleaning after we pulled all the suspension bits off…

The chassis got a good cleaning after we pulled all the suspension bits off…

Tuesday, November 20, 2018

111RS Spyder Build: Part 1

We are building a new Lotus Elise Spyder and I wanted to start blogging about the work. This car is based on an Exige S240 and will feature many of our mechanical upgrades. We have a brave client, Shane, who has agreed to be our sponsor and I can’t think of a better client to work with. Shane has owned many cool cars including an Elise, Atom3, GTR, and more.

Our inspiration

Our inspiration

We love light cars and the Lotus are from the factory, very light. Drastic measures are needed to really shave weight from these cars. Our donor Exige S240 had rolled on track so was in need of new bodywork so we got thinking…this sketch below came from one brainstorm with a designer Sergio.

cropped sketch.jpg

We decided to run with this rally inspired style and landed on the following renders from our friends at RogueCollective.

111RS Spyder Homepage3.jpg
111RS Spyder Homepage2.jpg